  The critique yesterday didn’t turn up anything pressing to fix, so here’s the final project! Next, I’ll be matting
1 Comment
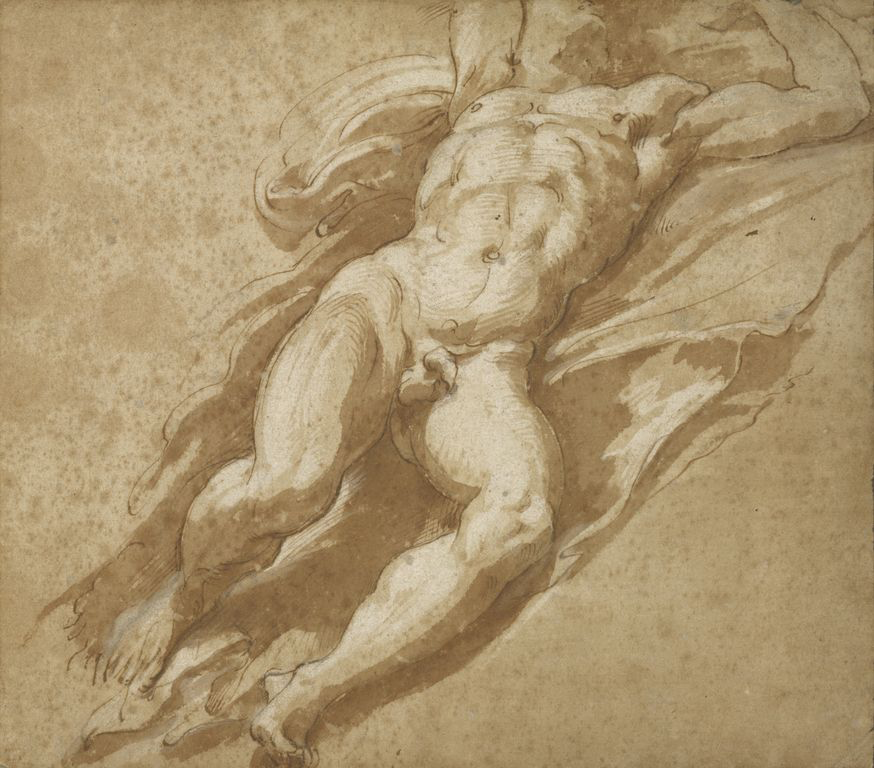
I took it home over Election Day to finish it throughout the day. I finished the ink wash portion completely by Monday night. Tuesday afternoon was spent first adding the contour lines and hatching in ink. It didn't bleed as much as I thought it would, and I was able to hide some of it when I added highlights. I had to wait for the ink to dry completely before I felt safe enough to add the white acrylic. The application wasn't difficult, but it was difficult to determine what was a highlight and what was the "white" of the paper. Because I watered down the acrylic paint a little to create some translucency, it ended up drying more translucent than it applied in some areas. I went over those areas again with solid white and resolved that. The only thing I added not shown in the photos is my signature in the bottom right corner.
All final marks I've made on my project have been in the last week. On Monday I finished transferring the image with pencil, and on Wednesday I toned the paper and practiced with the media on a scrap piece I had. The toning was somewhat disappointing because I thought I'd matched the shade of the paper but it got significantly lighter when it dried, so I plan to retone the negative space when I'm finished with everything else. I attempted to recreate the texture of the background but most of the drips I did settled into the tone and the darker ones separated because I used a mix of brown and black ink. They're from different brands so in another space in the top right of the paper you can also see some separation, but it's not as visible since I washed over it with solid brown ink. Otherwise, no other separation has happened. On Friday I started using ink wash and I did the fabric around the body first, thinking it would be easier to work in a defined negative space and it was easier to see the shapes of the wash on the body once I did. There's a pretty big gap in progress shots since I didn't have my phone Friday, but the 5th image was taken at the end of Friday. Throughout all of it I've been trying to recreate the splotchy effect the wash has and it's been somewhat successful in some areas like the left calf. Everything is still vague and splotchy but I'll add the defined contour lines in ink once I'm done with the wash. I took it home over the weekend and made most of my progress Friday night and today. This weekend my goal is to finish the wash completely on the legs so Monday in class I can use the ink to add contour lines and white gouache to add highlights. I'll take it home again then if I need to and use Tuesday to finish it in time for the critique Wednesday. I don't think time will be an issue. I feel comfortable in my progress. My main struggle right now is distinguishing the "white" of the paper from the "white" of the gouache. I think I've identified most of the gouache, but in larger areas such as the thigh it's harder to tell.
Today I continued transferring the image using the grid I had set on the paper the previous class. The pencil lines are faint and difficult to see in the photo, but that's because I'm using ink wash afterwards. I can't erase pencil from under ink wash as I could pen, so everything is faint and should disappear into the wash. Originally, I planned to tone the paper to the sepia shade of the original, but I decided not to with the advice of Mrs. Mosley. This was mostly because we decided ink wash had about the same effect as toning (with watercolor) but in individual patches, and upon closer inspection of the original, it seemed the highlights were both the white of the paper and white gouache. The extreme use of foreshortening makes it difficult to transfer since it never looks q u i t e right without any indication of form, but hopefully that will resolve as I progress.
|
